
To set up a SuperBox, connect the box to your TV with HDMI, connect the power supply, select the correct HDMI input, join your WiFi network or connect Ethernet, and pair the remote when prompted. The general process is the same for the SuperBox S7 Max, S7 Ultra and S7 Pro, although some menu names may vary slightly with software updates.
This first-time installation guide walks through each step, explains what to check before you start and provides practical fixes for the most common setup problems.
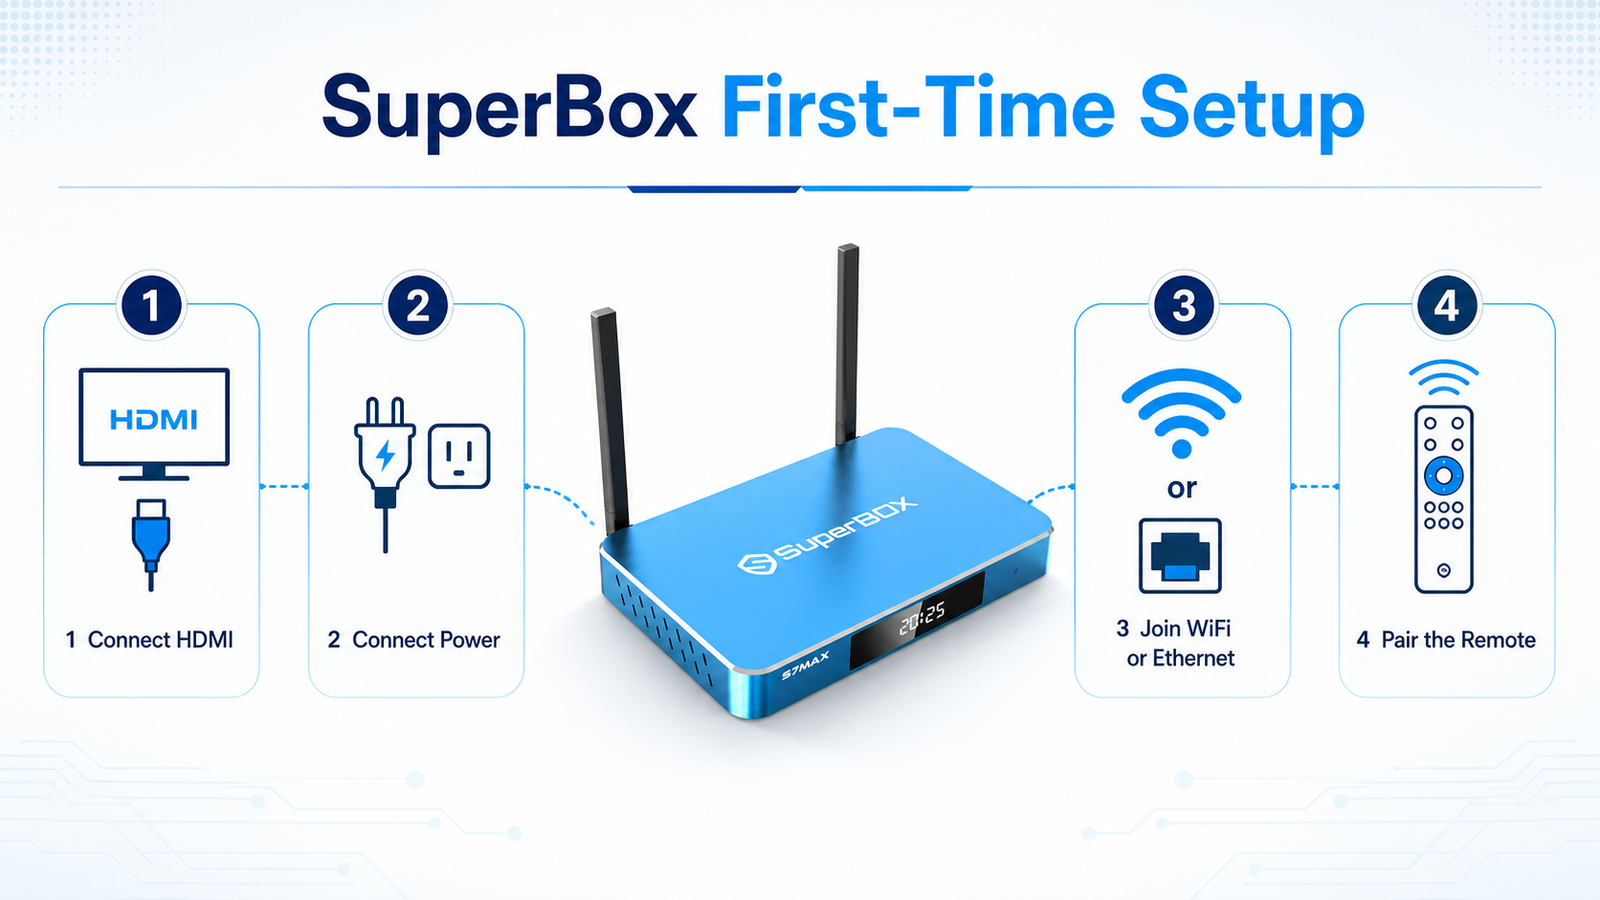
SuperBox setup checklist
Before turning on the box, make sure you have:
- A TV or display with an available HDMI input
- The SuperBox power supply and HDMI cable
- The included remote control and two compatible batteries
- Your WiFi network name and password, or an Ethernet cable
- Enough space around the box for normal ventilation
If you are still choosing a model, you can compare the SuperBox S7 Ultra, S7 Max and S7 Pro before completing your purchase.
How to set up SuperBox step by step
1. Connect the SuperBox to your TV
- Place the SuperBox on a stable, ventilated surface near your TV.
- Connect one end of the HDMI cable to the HDMI port on the SuperBox.
- Connect the other end to an available HDMI input on your TV.
- Connect the supplied power cable and adapter to the SuperBox, then plug the adapter into a power outlet.
- Turn on your TV and choose the HDMI input you used, such as HDMI 1 or HDMI 2.
The SuperBox welcome screen should appear after the device starts. If the TV shows “No Signal,” confirm that the TV is set to the correct HDMI input and reconnect both ends of the HDMI cable.
2. Follow the initial on-screen prompts
Use the remote to follow the first-start prompts. Depending on the software version, you may be asked to review a notice, select a language, choose a network and adjust the visible screen area.
Read each screen before selecting an option. Interface wording can change after a system update, so use the labels displayed on your own device rather than expecting every menu to look identical to an older tutorial.
3. Connect SuperBox to WiFi or Ethernet
During first-time setup, select your home WiFi network and enter the password carefully. If you need to connect later, open Settings > Network & Internet > WiFi, turn WiFi on and select your network.
You can also connect an Ethernet cable from your router directly to the box. A wired connection can be useful when the router is far from the TV, the WiFi signal is inconsistent or several devices are using the wireless network at the same time.
After connecting, wait for the network status to show that the device is online before continuing.
4. Adjust the screen size and display
If the edges of the interface extend beyond the TV screen, use the on-screen display adjustment or screen-position controls until all four edges are visible. You can revisit display settings later if the picture looks cropped or text is difficult to read.
Choose a resolution supported by your TV. Higher output settings do not improve a display that cannot accept them, so the recommended or automatic setting is normally the safest starting point.
5. Pair the SuperBox remote
Insert fresh batteries into the remote. Basic infrared navigation may work immediately when the remote is pointed at the box, but Bluetooth pairing is required for features such as voice control and more flexible remote positioning.
- Keep the remote close to the SuperBox.
- Follow the pairing prompt shown on the TV.
- When instructed, press and hold the Back and OK buttons together until the remote indicator begins flashing.
- Open the Bluetooth menu if required and select the remote shown in the available-device list.
- Confirm that the remote responds without needing to point directly at the box.
The remote name and exact pairing screen can vary. If your package includes model-specific instructions, follow those instructions first.
6. Check for system and app updates
Before installing additional apps or changing advanced settings, check the device for available updates. Install updates only through the system’s supported update function or a trusted app source, and do not disconnect power while an update is in progress.
Avoid downloading unknown APK files from unverified websites. App availability, accounts and subscriptions depend on the app provider and your region.
7. Test the basic functions
Before considering the setup complete, perform a quick check:
- Open Settings and confirm that the internet connection is active.
- Check that the remote navigation, Back and Home buttons respond normally.
- Test the TV volume and confirm that audio is coming through the correct output.
- Open a supported app to confirm that the picture and network are stable.
- Restart the box once if an update was installed.
SuperBox S7 model setup notes
The basic installation process is shared across the current S7 range. The main product differences are storage capacity, remote design and price rather than the HDMI and network setup process.
- SuperBox S7 Ultra: 4GB memory, 128GB storage and a backlit voice remote.
- SuperBox S7 Max: 4GB memory and 64GB storage, positioned as the balanced S7 option.
- SuperBox S7 Pro: 4GB memory and 32GB storage at the lowest current S7 price.
If your on-screen menus differ from the descriptions above, check the user guide included with your model or contact the retailer that supplied the device.
Common SuperBox setup problems
The TV says “No Signal”
- Confirm that the SuperBox power indicator is on.
- Select the HDMI input that matches the port used on the TV.
- Reconnect both ends of the HDMI cable.
- Try another HDMI port or a known-working HDMI cable.
- Restart both the TV and the SuperBox.
SuperBox will not connect to WiFi
- Re-enter the WiFi password and check capitalization.
- Move the router or box closer if the signal is weak.
- Restart the router and the SuperBox.
- Forget the saved network, then connect again.
- Use Ethernet temporarily to determine whether the issue is limited to WiFi.
The remote does not pair
- Install fresh batteries and confirm their direction.
- Move the remote closer to the box.
- Restart the box and repeat the on-screen pairing sequence.
- Hold Back and OK until the indicator flashes.
- Remove an old remote entry from Bluetooth settings before trying again.
The picture is cropped or too large
Open the display or screen-position settings and reduce the visible area until every edge fits. Also check the TV’s picture-size setting and disable unnecessary zoom modes.
There is picture but no sound
- Make sure neither the TV nor the box is muted.
- Increase the volume using the original TV remote.
- Reconnect the HDMI cable.
- Check whether the TV is sending audio to another speaker or soundbar.
- Restart the SuperBox after changing audio settings.
Frequently asked questions
Can I use SuperBox with any TV?
You need a compatible TV or display with an HDMI input. Picture resolution and advanced display features depend on the capabilities of the connected TV.
Does SuperBox need internet?
An internet connection is required for online apps, updates and internet-delivered services. You can connect through WiFi or Ethernet.
Do I need a SuperBox for each TV?
A single SuperBox normally connects to one display through one HDMI output at a time. To use boxes independently on multiple TVs, each TV generally needs its own device.
Should I factory-reset a new SuperBox?
No. A factory reset is not part of normal first-time installation. It erases local settings and should be reserved for troubleshooting after simpler steps have failed or when support specifically recommends it.
Where can I get setup help?
Start with the included user guide and the on-screen instructions. Customers can also visit our SuperBox support page or review the frequently asked questions.
Your SuperBox is ready to use
Once the HDMI connection, internet connection, remote pairing and display settings are working, the first-time SuperBox setup is complete. Keep the box ventilated, install updates from supported sources and save the packaging and user guide in case you need the model or order information later.
Ready to choose a model? Browse available SuperBox TV boxes from our authorized U.S. retail store.